I’m a content creator with a solid five years of experience in the industry. And let me tell you, if there’s one form of video content that’ll definitely make you some good profits, it’s travel videos.
And don’t just take my word for it, check it out yourself:
- 64% of people considering a trip watch travel videos to plan their trip.
- Travel videos often land in YouTube’s trending content.
- Search engines report travel videos to be the most searched term in the traveling industry.
- Travel reels and videos rank as the most-loved content on TikTok and Instagram.
It’s clear. Travel videos have a massive audience out there.
But that also means the industry is saturated. You’ll need to work a little smarter to make your way to the top.
That’s exactly what we’ll help you figure out in this guide. Over here, we’ll be sharing how to make a travel video right from the ABCs (newbies, pull out your notebooks!). Following that, we’ll share ten exclusive tips that we acquired from top video creators in the industry.
Let’s go!

Table of Contents
Travel Video Basics: How to Make One?
Before I lay down an actionable plan, I assume you have a strong grip on how to handle professional gear. Or you know how to record professional videos with your smartphone.
If you don’t, please browse the following guides and then get back to this one:
- The complete checklist of videography equipment for beginners
- How to shoot an awesome video with an iPhone?
Now that we’re on the same page, let’s proceed.
Stage 1: Ideation & Planning
Ideation
Planning is the key to recording a successful travel video. Whether you’re planning a trip for recording the video or recording a video because you’re on a trip, I urge you to trace down the thought that gave you the idea. Ask yourself:
- What motivated you to film this travel video?
- What do you wish to achieve from this video?
Once you have the answers to these questions and know why you’re doing it – you’ll be through your ideation phase. Jot it down on a notepad physically or digitally.
Your ideas for the video could look like this:
| Ideas | Examples |
|---|---|
| I want to create entertaining content for my lifestyle or personal blog on Instagram/TikTok/YouTube and boost my engagement by 3x. | You’re an Instagram influencer visiting Bali. You can create short reels of all the restaurants you’re trying and the fun activities you’re engaging in. |
| I want to promote my service/product with respect to the place I’m visiting. I want people to visualize the practical use of my product/service. | You sell leather jackets. And you’re visiting a cold country. You can use this opportunity to film a fun travel video while casually marketing your product. |
| I want to educate people and build a community | You try out the most popular places on your trip to Sydney. You record your experiences and share your honest reviews about whether the experiences were worth it or not. |
Scripting & Planning Shots
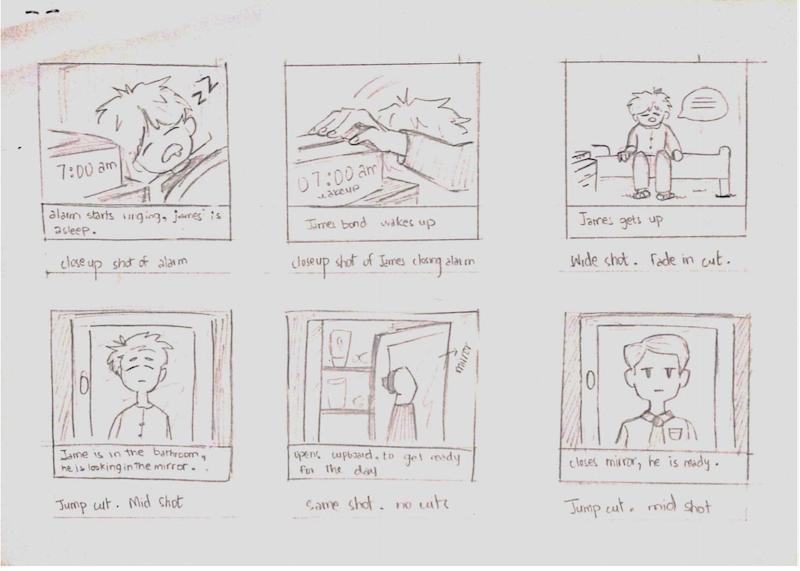
When you have your goal in sight, create a storyboard of what the shots would look like. You should have:
- A hook to begin your video
- Frame by frame plan (including the message to deliver and the text/background music)
If you’re aiming for a short travel video, browse this guide about how to make a viral video. It’ll give you a solid lead on what elements to include in your video and what to avoid. For a travel video that’s longer than five minutes, you can include all that you like. Just make sure you compile it in an interesting manner.
Your video storyboard may look like this:
Credits to Artist
It’s not supposed to be anything fancy. Just make sure you have a physical or digital copy of this storyboard prepared before you leave for the trip. Here’s a template you can use to get started.
Preparing Your Gear
Whether you’re filming with a professional camera or with your smartphone, you ought to know the angle and settings you’ll use for each shot.
Some of the best angles to film a travel video are as follows:
- Wide Angles and Slow Pans
- Time Lapse Shots
- Stabilizing Rotation Shots
- Lower Angle Shots
And here’s a list of videos that can help you understand the mentioned camera angles better:
- 12 Camera Angles to Enhance Your Films (Refer to 1:20 – 1:35)
- Time Lapse Examples
- Travel Videos: Best Camera Angles (5 Tips)
Before you head out on your trip, make sure you have a good command over your gear (including camera, lights, mic, laptop, and related accessories). Ensure that all of these work smoothly and have a robust construction (keep weather and traveling conditions in mind!).
Stage 2: Recording
Warning: Things will not go exactly as you planned.
Traveling is unpredictable. So, mentally prepare yourself to deal with last-minute changes.
When you reach your pre-determined site, ensure that it’s the right environment you need to achieve the purpose of your video. Its vibe and looks should sync with your idea and script. It should bring in the right emotion in your video.
When you begin recording your video, make sure you get multiple versions of your planned shots. Do not push yourself to get it all right in one go. This is exactly why you planned your script frame by frame. You’ll have to record it in bits and pieces (especially if it’s a public place) and compile it neatly later.
Tip: Try filming your new shot in the same position you ended your previous shot.
Stage 3: Editing Your Travel Video
Here comes the heart of your travel videos: editing.
Usually, raw footages shot in foreign settings and under tight deadlines are:
- Shaky
- Noisy
- Misaligned
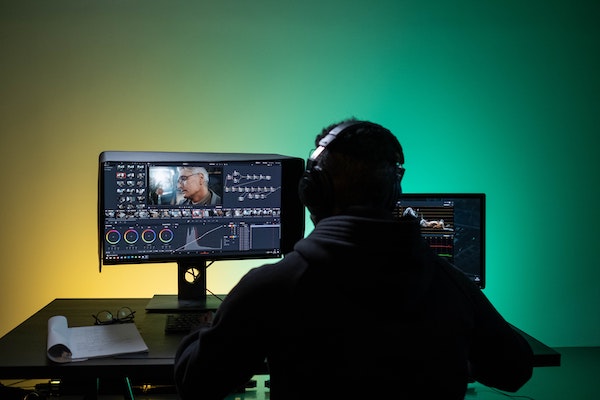
Therefore, these videos require thorough editing before they’re ready to go public. You’ll need to crop clips, arrange them in sequence, add transitions, fix frames, filter visual and audio noise, add smooth transitions, and so on.
More importantly, you’ll have to sync your edits with your storyboard. You’ve to ensure that the edits give the feel you wish to convey or evoke the emotion you’re targeting.
For example, if you’re making a travel documentary, you’ll have t incorporate stable, wide-angle shots with soft music. Similarly, an entertaining travel video will require fast transitions and upbeat music.
If you’ve got the time and feel you’ve got a sense of video aesthetics, you can try online video editing software like InVideo and veed.io. Such editing software work great for beginners. They offer a wide range of templates that you can use to fix backgrounds. They also offer:
- Filters
- Background music
- Cropping features
- Creative text editing options
- Auto noise editing, and much more.
If you’ve ample knowledge of video editing and think you can edit your raw footage (such that it’ll appeal to your target audience well), you can try a hand at robust and professional video editing software like Adobe Premiere Pro.
But if you haven’t got the time and are not very confident whether you’ll be able to deliver the right emotion and message, you should entrust a professional video editor. It’ll save you time, money, and effort and help you make the best of your filmed content.
For example, if you entrust editvideo.io with your travel video, human editors on their team will use their creativity combined with yours to make the best of your filmed content. Plus, this approach allows you to focus on one goal at a time. Right now, you’re learning how to make a travel video, it’s best you perfect the filming aspect and let someone else take care of the editing needs.
With that said, you can browse the best video editing services here in this post.
Optimizing Travel Videos for Your Audience: Tips from Professionals
Recording a travel video may appear too simple of a task right now. But when you get to it, the process will be a lot more challenging than it seems.
You’ll find yourself super stressed unless you’re a video creator and a traveler at heart (which is a rare combination). You might be discovering a lot of new things in the eleventh hour, which may disrupt your plans. You’ll have to make last-minute decisions and find alternate routes.
In this chaos, you may end up with shaky, boring videos that radiate i-just-did-this-because-i-had-to (especially if it’s your first time!).
For that very reason, I’ve listed some hacks and tips below. These can help you avoid messing up your videos.
#1. Prepare Your Camera Before the Trip
Make sure your camera is charged, has a fresh SD card or plenty of storage space, and also ensure you’ve set it to your ideal settings. If you’re going to use lights or different lenses, test the accessories before you pack your gear for traveling.
#2. Shoot in Broad Daylight
Experts don’t recommend shooting at night or in low light when filming a travel video. You probably won’t have enough time to arrange a proper lighting setup, so it’s best not to risk your travel videos.
Videos shot in broad daylight often capture vibrant colors and complete details. And this makes the video more appealing to the viewers.
#3. Shoot the scene, not yourself.
Your audience is watching a travel video to experience a different part of the world right from their homes. They have little interest in what you’re doing or how things appeal to you.
So, it’s best to keep the camera focused on what you’re seeing rather than yourself. They wish to see what you see, so give that to them!
#4. Do not try to cover too many places in too little time.
Ideally, it’s best to cover one city in one minute. If you’re giving a detailed review or tour of the place, you can dedicate one minute to one place, i.e., a tourist spot or a restaurant. But if you’re giving a quick glimpse of all that you did, one minute suffices for one city.
Do not try to pack more than one city within one minute. Also, it’s good to use a mellow instrumental for quick videos like these.
#5. Incorporate a soundtrack
Short travel videos shouldn’t have any narrations in the background. You should incorporate a suitable soundtrack that complements the vibe of the travel video.
If you have got a long travel video (2+ minutes), you can include narration. But according to statistics, most people watch travel videos because of the accompanying wanderlust feel. So, you should merge your talk with a bit of mellow music in the background to make it satisfying and retain the audience.
#6. Use Slow Zooming Capabilities
When you film on your trip, you might move a lot, and the slightest of movements can ruin the whole feel of your video. So, experts recommend using slow zooming capabilities to increase the dwelling time of viewers.
End Note
By now, I hope you’re super clear on how to make a travel video. I hope you take a great start.
But before I sign off, here’s something I want you to do. Come up with a travel video idea. Your goal for this video is to make your locality sound appealing to me.
Create a rough storyboard on paper and share it at support@editvideo.io. Creatives from team editvideo.io will be sharing their feedback and featuring the best storyboards on Instagram and YouTube, giving you a shoutout. Good luck! 🙂


